Hello Friends!
Today I’m gonna show you an easy nail art. This kind of nail arts are my favorite because you can make it in few minutes and, due to the fact that in this nail art you shouldn’t be precise, you can also make it at last minute, without any particular tools.
All of us girls love have perfect hands, shiny nail polish… but in my opinion a monocolor polish could be so boring! For this reason I make by myself my own easy nail art: a strange pattern or decoration in each nail, or an accent manicure with monocolor on all nails except the ring finger in which I love make some bizarre decoration. I really love having a professional manicure, but really often after a couple of days, I want to remove or change the nail polish. Considering that a good manicure is not so cheap… what a pity! Due to this I use to take care of my hands and nails by myself, and I make my own personal pattern and nail art.
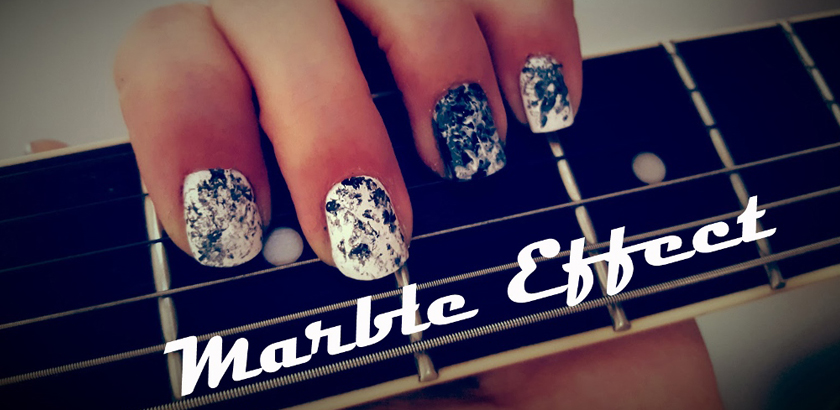
One of the effect that I see mostly around me, at least in New York City, is the Marble Effect. I already showed you one technique for doing it in a previous post (Marble effect inspired by Jackson Pollock’s art) starting from the Water Marble technique, using water and perfumes. The way I’m gonna show you today is way easier that the previous one!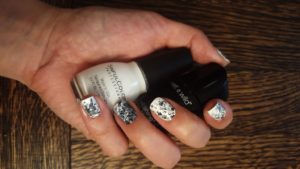
Just to be completely clear, this is not my own idea, I saw a lot of american YouTubers that made almost the same nail art in a similar way. In any case, pretty much all of them are professionist or nail artists, so I decided to try the same technique by myself because I’m not a real Nail artist, I’m a kind of amateur of nail art, a beginner, so if I can do it, everyone can do it!
Let’s see what I’ve done!
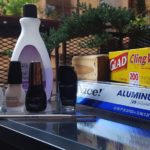
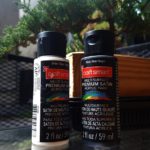
For this nail art you need: nail polish (of course) but you need also of a pieces aluminum foil, in which I put some drops of color, and a piece of cling wrap that I wrapped and used like a plate. For my own decoration I tried to use acrylic colors, but nail polishes are good as well for the purpose.
Here a little movie in which I show the products and the steps for an easy Marble effect.
Strength points
- You don’t need any particular tool, all you need is already in your apartment;
- It is not necessary to be precise;
- You can choose the intensity of the pattern, you just apply multiple layer of the pattern created with the wrapped cling wrap;
- It is easy, the pattern drys very quickly.
My impressions about the used products
For this nail art I used product from SinfulColors and Wet n Wild. I really love these products, I like the colors and they are easy to use, in addition, the ratio between quality and price is really good.
- Black Polish Wet n Wild # 485D: as I already said in the previous nail art’s post, I like the consistency of this polish. It is not too liquid and it covers well with a single layer. It is really shining. The only defect is the brush, a little bit too tiny for me;
- White Polish SinfulColors #101 Snow White: it is one of my favorite white polish! It covers the nails perfectly with an only single layer!
- Base e Top Coat are both by SinfulColors, the base coat # 902 it’s not bad, it drys quickly and protect my natural nail. It is not my favorite base coat (my favorite one is the Pupa Milano Base Coat super smooth). Regarding the Top Coat #1600, I’m not totally satisfied from it. I tried before another SinfuColors top coat, and I found it too aggressive and it erased a bit the nail polish applied below. The one I used for this nail art is SinfulColors as well, but it is a different one. Although the consistency was different from the previous top coat, the result was the same: too aggressive as well. It’s a shame because I really love the extra shining finish of the top coat, but i don’t suggest you to use it on a nail art, because it’ll ruin the pattern.
I hope you like the post and the video. I hope as well that it can be useful for some of you. As I said at the beginning, the technique is really easy, you don’t need to be a professional nail artist, indeed everybody can do this nail art.
Let me know in the comments box below what do you think about this nail art and if you know different way for doing the marble effect!
We’ll see on the next post!
Stay Tuned!
Tricks in this post:
1. a second technique for doing the Marble effect nail art;
2. fast review of used products;
3. Video tutorial.